2010-11-15

Pear Box - Late 2010

This is one in a series of posts about some of my past projects.

A friend of mine was retiring after many years. I wanted to do something nice for her, so I made her this end grain box out of pear. Sent it via UPS and she got it the day before she left; her voice was cracking when she called to thank me she was so pleased. Other people had given her money and gifts they bought, but she thought I was fantastic for actually making something myself for her.


2010-10-05

Large Spalted Bowl - October 2010

This is one in a series of posts about some of my past projects.  This was done in October 2010.

It's the first bowl I've done with my chuck. The wood was falling apart as I turned it, no matter how light of a cut I made - a bit too spalted... Eventually got it as good as I thought I would, then started hollowing the inside with my spindle gouges. The bottom is a bit thick at around 3/4" with the sides around 1/4" or so. Just seemed like I couldn't get the bottom any thinner with the spindle gouges without the wood shredding and the tool catching a lot. I had to do a fair amount of sanding and there are still a few tool marks in it. The bottom has a round-over to it - you can see it in the pics. After I got done sanding, I used several towels to fill it and brought my tailstock up to reverse-turn the tenon off and turn a concave foot so that the outside is just off the surface it rests on. (The wood was also tending to shred as I turned the concave foot.) I finished it with several coats of wipe-on poly, then wet-sanded and used 0000 steel wool to rub carnuba wax into it. The wax was polished off after it was dry, then another coat applied with a soft paper towel, allowed to dry, and polished off.


2010-09-18

Pill Holders - September 2010

This is one in a series of posts about some of my past projects.  This was done in September 2010.

I gave myself a concussion a few months ago and am still taking prescription painkillers as I need them; thankfully, no longer a daily thing. Last week, I was supposed to meet friends for dinner after an activity and ended up being late because I had to run home for a pill because my head was hurting so much. Well, I decided to do something about it and turned myself a small pill holder to keep in my pocket. It's made out of bone-dry apple wood.

This is how it was before I started:


After the scrap wood has been removed:


And after it has a coat of wipe-on poly applied; I love how it darkens down and almost looks like cedar:


Having moderate success with this, I decided to make something similar for my mother to carry in her purse for her medications. Since she takes pills instead of eating breakfast, it had to be larger. I ended up using the other end of the branch of apple wood I used for mine and ended up with this; no finish yet (dunno if I'm even going to bother finishing it; might just toss it):


And because I didn't verify that the headstock was rotated back to be in perfect alignment with the tailstock, the cover and body are 'off'.  Really confused me until I figured out what was going on...

Pear Toothpick Holder - September 2010

This is another in a series of posts about some of my past projects.  This was done in September 2010.

I made a toothpick holder for my sister's birthday. It's made out of pear and was turned very green. Since her birthday is Monday, I had to finish it before it was dry, but I don't think it'll pose a problem. Hollowing as deep as I needed for the toothpicks with my 1/4" spindle gouge was the hardest part.


2010-09-10

Cherry Dish - September 2010

This is the continuation of a series of posts about some of my past projects.  This was done in September 2010.

A local business trimmed their cherry tree this past May and I snapped up the wood they discarded. My father owns a van and so we both went to pick it up. One piece was just a splitting off the edge of a trunk section maybe a foot long, 5" wide, and 1.5" thick, including the bark. My dad looked at me like I was crazy when I picked it up and ripped on me all the way home for taking the 'junk wood'.

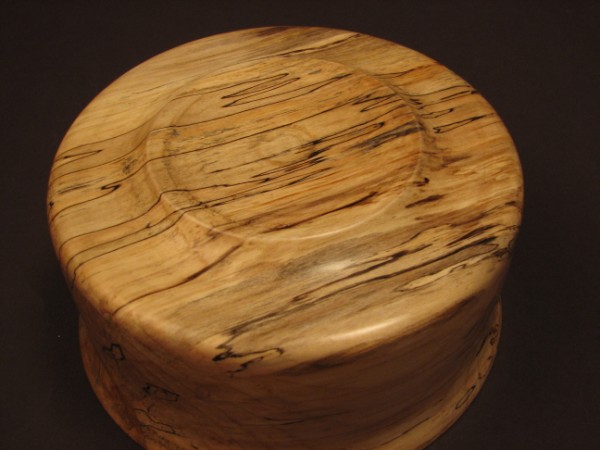
Well, I went on the lathe this past Sunday and decided to use a piece of that junk wood - looked at it, cut the non-split end off, mounted between centers, and proceeded to turn it round. After I got done, there wasn't much left, but enough to make this small cherry dish. Having no chuck, I glued it to a waste block on my face plate and returned it after the glue was dry, but the wood had already cracked - this is the crack on the side you can see in the pictures. The crack has been filled with wipe-on poly and after the finish cured, had carnuba wax impregnated into the surface with 0000 steel wool, then another coat applied with a soft cloth.

I had some difficulty with the parting tool leaving chatter marks on the bottom, as the lag screws holding the waste block on and initial piece being so thin didn't leave much room for my parting tool - it chattered and rattled around more than a little, producing a series of spiral grooves on the bottom.

Overall, I'm happy with how it ended up, even though it's far from perfect. Plus, I now get to show my dad what I made out of a piece of 'junk wood'. 


2010-09-01

Two Cherry Bowls - May or June 2010

This is another post in a series showing some of my past projects.  Because of the concussion I suffered,  I don't really remember even making them or when exactly they were made, but I do know that I did indeed create them either in May or early June 2010.

I also have two smaller bowls turned from pieces of a cherry tree that a local business trimmed. The first and second labeling below really mean nothing as I don't know what order I turned them in; all I really do know is that both must have been some time in May or early-June.

The first is one with a lip that overhangs the opening with sharp angles. As you can see, it warped slightly after it was turned and ended up cracking near a knot. Doesn't look too horrible though. I used wipe-on poly followed with wax again.


The second has a flared out lip and again warped after I was done, cracking in the process. You can also really see the warpage in it due to the flared out lip. Again, my standard finish of wipe-on poly and wax was used. I really like how there's an X pattern in the grain on the one side.


2010-08-31

Small Spalted Bowl - September 2010

This is another in a series of posts about some of my past projects.  I turned this bowl in September 2010.

One Sunday, I had a very good day - while I wasn't back to normal, the pain level was much reduced and I wasn't having balance problems or dizziness. I decided to turn something while I felt good and grabbed an odd-sized piece of spalted maple; getting back on the lathe after over 2 months of being off it felt good, even though I'm a relatively new turner. This bowl is what I ended up with. I had similar problems with the wood tending to disintegrate rather than cut, but it was far less than with the large bowl. I tried using a scraper after the majority of it was hollowed using spindle gouges - I guess it worked, but it was S-L-O-W and I don't think it's a good technique for removing much of anything. I have an undercut lip and just completed finishing it tonight. Again, I used several coats of wipe-on poly followed by a wet-sanding and a few coats of wax.


I think I'm going to use the small piece of spalted maple left over from this bowl to make a coaster the next time I feel up to using a power tool. I know it's kind of a waste using spalted wood to make a coaster, but that's about all I can think of that it's big enough for...

2010-07-15

Bud Vase - Mid-2010

This is another in a series of projects that I've done in the past. I hit my head at work in mid-June - ended up giving myself a concussion and actually fractured the top of my skull. I didn't do much because of the ramifications; concentration and memory are shot, balance problems, massive headaches (on par with or worse than migraines), blackouts, dizziness, etc. I'm still not right (even though the workman's comp "doctor" was paid off to say I'm fine), but am having days where the symptoms are significantly less. (Still taking the prescription painkillers far more often than I'd like though...) Needless to say, I wasn't been on the lathe, or used any power tools, much after this happened.  I go on as much as I can, but stay away if my head hurts or feels weird.  If you know anything that can be done to reduce concussion symptoms, PLEASE comment and/or e-mail me - I'm really sick of this!  I hit my head June of last year and still have problems in February 2011!  Anyways, this injury gave me some time to apply finish to several projects I'd turned prior to the concussion.   This was turned at the very start of June and had finish applied in September.


Here's a dry vase that I turned from a piece of bone-dry apple wood. I turned the outside using a skew to give it a gentle subtle curve, epoxied it to a waste block, then used my brand new HF drill chuck in the tail stock to hold a 1" spade bit and slowly drilled a hole. I put a zig-zag pattern on the lip of the vase. Ended up having to re-epoxy it to the waste block twice. Finished with a few coats of wipe-on poly.


2010-06-15

Large Spalted Bowl - Mid-2010

This is another in a series of posts about some of my past projects.  I turned this bowl at the beginning of June and had finish applied in September 2010.


I turned a piece of spalted maple into a large bowl - the biggest turning I've done to date in fact. It was dicey at times because not only did I use nothing but spindle gouges to turn it, but the wood was a little too spalted in places. It was literally falling apart in areas, but I refused to give up on it and in the end managed to get a descent, albeit thick-walled, bowl out of it. There's one area that actually shrunk after it was done turning - it was where the wood was the most rotten and it's a little thinner walled in that spot. I literally soaked the end grain from both directions in wipe-on poly in an attempt to stiffen up the wood fibers while it was on the lathe, but it had a minimal effect. The entire bowl is finished with many, many, many coats of wipe-on poly, wet-sanded, had a coat of carnuba wax applied with steel wool, then 2 more coats applied with a non-abrasive pad - gives the finish a satin sheen and is exceptionally smooth.


2010-05-31

Apple Box - June 2010

I turned one of the biggest pieces of apple branches I have tonight. After rounding it and removing the bark, I discovered that the split I saw on the end and thought I'd cut off before mounting it went halfway down the branch and extended about halfway through the diameter of the piece of wood. Ah well - nothing to be done but work with it - I cut it in half, gluing the good half to a waste block with 5 minute epoxy. (I wanted something quick and fast-drying because I was gluing end grain and didn't want all the glue getting sucked up by the wood.) Worked great - I was able to successfully hollow out the form and create a round box with slightly undercut edges.

Originally, I didn't plan on a cover, but had about an inch of wood left. Since I'd turned a tenon on it slightly smaller than the opening and used a paper towel for a jam-chuck (first time for me), I decided to give it a shot. I used the same 1/4" gouge I used to hollow the box out to round over the top, turning away the waste block as I did so. The epoxy didn't hold when it got down small, so I decided to do the same thing again - turned a hole in the waste block and used the same towel to jam the lid in place. I was then able to finish the top of the lid.

I took these pictures and then applied a coat of wipe-on poly, which is presently drying as I write this. The whole thing is an even thickness, including the top - just under 1/4". I'm very pleased with how it turned out and can't wait to show the guy who gave me the apple wood to use in my smoker a couple years ago. It's still surprising to me that such beautiful wood looks like such utter crap before it's put on the lathe.


Here are a few pictures of it with the final coat of finish on it. The first coat was wipe on poly with 1/3 poly, 1/3 boiled linseed oil, and 1/3 mineral spirits. Subsequent coats were wipe on poly with 1/2 poly and 1/2 mineral spirits. (I found the addition of oil to the first coat accentuates the grain of the wood. Removing the oil from later coats drastically shortens dry time and I can't see a difference between doing it this way and using the finish with oil for later coats.)