2010-05-31

Apple Box - June 2010

I turned one of the biggest pieces of apple branches I have tonight. After rounding it and removing the bark, I discovered that the split I saw on the end and thought I'd cut off before mounting it went halfway down the branch and extended about halfway through the diameter of the piece of wood. Ah well - nothing to be done but work with it - I cut it in half, gluing the good half to a waste block with 5 minute epoxy. (I wanted something quick and fast-drying because I was gluing end grain and didn't want all the glue getting sucked up by the wood.) Worked great - I was able to successfully hollow out the form and create a round box with slightly undercut edges.

Originally, I didn't plan on a cover, but had about an inch of wood left. Since I'd turned a tenon on it slightly smaller than the opening and used a paper towel for a jam-chuck (first time for me), I decided to give it a shot. I used the same 1/4" gouge I used to hollow the box out to round over the top, turning away the waste block as I did so. The epoxy didn't hold when it got down small, so I decided to do the same thing again - turned a hole in the waste block and used the same towel to jam the lid in place. I was then able to finish the top of the lid.

I took these pictures and then applied a coat of wipe-on poly, which is presently drying as I write this. The whole thing is an even thickness, including the top - just under 1/4". I'm very pleased with how it turned out and can't wait to show the guy who gave me the apple wood to use in my smoker a couple years ago. It's still surprising to me that such beautiful wood looks like such utter crap before it's put on the lathe.


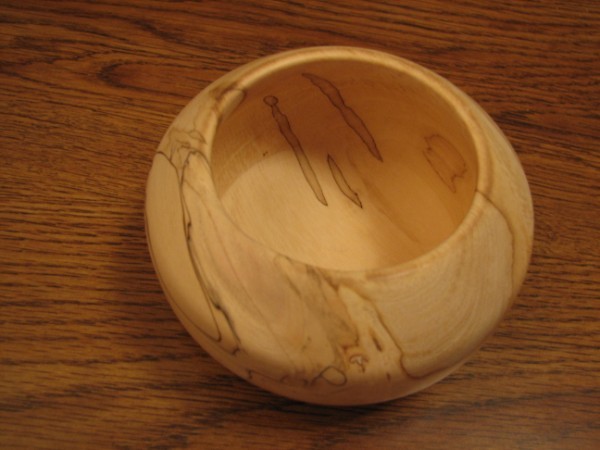
Here are a few pictures of it with the final coat of finish on it. The first coat was wipe on poly with 1/3 poly, 1/3 boiled linseed oil, and 1/3 mineral spirits. Subsequent coats were wipe on poly with 1/2 poly and 1/2 mineral spirits. (I found the addition of oil to the first coat accentuates the grain of the wood. Removing the oil from later coats drastically shortens dry time and I can't see a difference between doing it this way and using the finish with oil for later coats.)


2010-05-30

Maple Branch - May 2010

This is another in a series of posts documenting past projects.  This was at the end of May 2010.


Just before leaving work yesterday, a co-worker gave me a branch of a maple tree that came down in her yard. It was about 3-4" in diameter, but curved so only about 6" of it could be turned at a time. I cut off the end that was visibly split and then cut off a chunk to put on the lathe. The wood fell apart into two halves. The splitting extended up at least 18" into the 3.5-4' branch.  There were some worm holes and a couple of voids that I was soon to discover, but they didn't affect the structural aspect of the wood.

Anyways, I made 4 eggs and was pleased with how easy it was to work with - much easier than the apple/splated wood I've turned before. Seemed like the wood just peeled off and left a better finish than I've been able to achieve direct from the tool thus far.


You can see that I created some burn lines with the cloth side of the sandpaper, leaving no indentation (from wire or the like). I went kinda nuts with the technique on one of the eggs, creating many light lines. I also really like the smooth finish that the cloth rubbing gave the wood.

I then decided that I wanted to turn something else, but didn't know what. I just rounded the next chunk of wood and started turning. Got an idea and put the block of wood in the drill press vise and drilled a 3/4" hole 2" deep with a spade bit. The spade bit tore out the inside a bit, which I sanded the best I could with my dremel and sanding drums. After finishing the main part, I made a cover out of the last 3" of the branch, turning it carefully to fit well; snug without sticking. The grain of the cover even matches the grain of the body because it's from about 2" away in the branch.


I had a hard time finishing the point on top of the cover, probably because I had to turn it between centers, but eventually got it OK. The very tip is slightly discolored from rubbing on another piece of wood on the spur drive, but not terrible.

2010-05-28

Cup & Ball Challenge - May 2010

This is another in a series of posts regarding older projects.  This was done in late May of 2010.

Mine's not completely done as I'm still applying coats of wipe-on poly, but I don't want to miss out on this challenge. I made mine out of apple wood and made it unique in a few ways.


I made it quite small and simply designed. However, the ball isn't really a ball. The end of the catcher thing has a slight point turned on it; the ball has the same design - round except for a blunt point, just like that on the end of the catcher. It's rather easy to catch the ball with the pointed part down (even without string), so that's where I'm going to attach the string in order to make it more difficult. The other end is going to be connected to the pointed end of the base of the catcher thing so a good amount of momentum needs to be used to get the ball high enough to catch, again making the game more difficult than it would be otherwise.


Also, since I'm rather new at turning, I decided to use this project to practice. (One of the reasons I made it small.) I used a roughing gouge to round the branch, remove the twig remnants, and take off the bark. Other than that, the only tool used was a skew chisel. 


Somebody on WoodNet mentioned that they need to find somebody who would make one small enough to fit on the head of a quarter.  Well, I had to show off a little!


I put it off to the side to show the quarter. And if you leaned forward to look at the pictures, the force of your breath on your computer screen has probably disbalanced this and caused it to fall over...  Without the ball, it fits nearly perfectly with about 1/16" to spare all around. 

2010-05-26

Next Bowl - May 2010

This is another in a series about past projects.  This was in May 2010.

I roughed out the wood for my second bowl last night. While doing so, I got something in my right eye. I rubbed it a bit, the pain went away, no big deal. (Yes, I had safety glasses on; the new respirator wedges them up so there's a small crack underneath them. I bought a face shield today.) Today at work, my eye kept hurting like there was something in it. I looked in the mirror, moved my eye around, and holy... there's a wood chip still in it!!! It wasn't that small either... no idea how the pain went away and I was able to sleep with it in there.

Anyways, I soaked the bark inclusion with CA to firm it up. Tonight, I mounted it to a waste block with hot melt glue, then threw it on my face plate and went back at it. I re-trued the bowl and then sanded the outside well. Everything was going well.


I started hollowing and all was going well until this happened. Guess the CA didn't work all that well, though the structure of the wood was REALLY compromised by the inclusion.


I thought of slathering a good amount of clear epoxy over the entire chunk and putting it back on, then turning the whole mess. I ended up just turning it down and making another very short bowl out of it.  I then had problems getting it to stay attached to the glue block - note to self to never use hot melt glue for that...  After all was said and done, this is the result.


I hacked off the remainder of the tenon I left for centering with a utility knife, then sanded the bottom on my belt sander. It's definitely not perfect - gotta build a donut chuck so I can turn the bottom of what I turn.


I applied a coat of wipe-on poly after taking the pictures.

2010-05-15

First Bowl - May 2010

This is a continuation of some of my previous projects.  This was done in May 2010.

I finally finished sawing up the larger of the chunks of wood I cut last weekend. Took about forever to slice out the bowl blanks with the hand saw. (I do not own a chainsaw, but definitely need to buy one if I continue turning bowls; seems like I spent half my life out on the back patio cutting on that chunk of wood to get the section out I needed.) After I got a slice of wood cut off the log, I cut it up on the table saw, chiseling out what the blade couldn't reach. I believe it's maple, though the log it came from was long dead and the species was indeterminate. I mounted it between centers, turned it round, and then started shaping it into a traditional bowl shape.

Unfortunately, I didn't know that there was rot inside of the log when I started. It was so bad, that it was soft/wet and splattering on my arms as I turned it. So, I changed the profile of the bowl and made a sort of short saucer instead of a normal bowl.

Here's the rot after I turned down the bulk of the bad area:


The other side of the blank does not show any indication of the problems evident just a few inches away


After having the basic shape done, I mounted it to a faceplate (since I don't have a chuck), trued it up, and started hollowing. The hollowing went MUCH better this time, rather than trying to hollow end grain. I primarily used my 1/4" gouge, as the 3/4" and 1" gouges both tended to catch and draw outwards. (They're the ones in the $45 HF tool set; the turning tools I have.) The sides developed a few small splits during the sanding process, which I repaired with CA. It's sanded to 220.

I think I made the sides too thin; they seem very fragile- I had to sand quite a bit where the splits were repaired to get it smooth, which is part of the reason they ended up overly thin. You can see one part where the growth ring fell out during the final sanding process. I really like how the grain stands out and the spalting pattern to the wood; it wasn't something that I expected when picking out a felled tree to hack off a chunk of. There was a small amount visible after I got it cut, but I had no idea it'd look so cool when it got turned. Don't know how I'm going to finish it yet.


More Eggs - May 2010

This is another in a series of posts about previous projects.  This was also done in May 2010.

I turned wood on Thursday evening, making a few more eggs from the last chunk of one of the logs I got from the country. (The really stinky stuff that I'm not sure what kind it is.  <Probably Box Elder> ) Surprisingly, there were no shotgun pellets in this section. I wanted to play with the general design and came up with some nice variations. Here are the three eggs that I ended up making.


2010-05-12

Not-Easter Egg - May 2010

This is a continuation of my previous projects.  This was done in May 2010.

I couldn't figure out what to make tonight, so I just started practicing coves, V cuts, and beads. When about 80% of the block of wood was shavings, I had the idea to make something I'd seen online, so I started. Had just enough wood to make this wooden egg. Turned out well IMO, especially with my being such a beginner at turning.  Another good thing is that I didn't run into any shotgun pellets when making this.


2010-05-10

Sharpening Method, Mallet - May 2010

This is a continuation of my prior projects.  This happened in May 2010.

I found a way to sharpen my lathe tools that is much easier than the bench grinder. I used by 4x36 bench-top belt sander! Instead of having a multi-faceted finish on the bevel of the tool, it's now completely even and smooth.  I believe it's because the belt sander has a flat surface while the grinding wheel is (naturally) a circle.


Earlier, I went out in the country and sawed up parts of a couple of fallen trees - one was blown over and was being propped up by other trees and the other was long dead. I've no idea what either is - here's a couple pictures of the smaller:  <I believe that the smaller was Box Elder and the larger was spalted Maple.>


The bigger chunk that I have no pictures of it currently has some really cool spalted coloring (black and red randomly patterned lines) where I cut it. Bad thing is that when I put it down on my back patio, a bunch of large black ants dropped out. I pried out as much of the rotten area as possible and then dusted it with ant killing power. If I cut around the rotten parts and they extend into the wood as one would expect from how the outside looks, I think I'll be able to get 2-3 bowls out of it. (Or bowl blanks - whether they actually become bowls remains to be seen.) It'll probably take the rest of my life to cut it up by hand... took over 20 minutes to saw through in the woods! If they look as cool as I think they might, I'll head back and saw off more of the log; it's 20' or more long and I took about 18" of it.


I cut a couple of 3-4 foot chunks of the smaller one and put part of one of them on the lathe tonight. (This is the first time I've returned to the lathe since the last time, when the wood flew off the faceplate.) The bark fell off in the woods on the underside, but the top side was still well adhered. I turned between centers again this time and actually made something semi-useful!

This is my first attempt at making a wooden mallet. Actually, stated more properly, it's the end result of my 20th or 30th attempt, but is the first piece of wood I tried making one out of.  Because of a catch and tenon break, I had to leave the head-stock marks in the end.


While making it, I discovered a new-to-me way to use a skew chisel that resulted in a much finer surface than when using a gouge. After making the wood round with the gouge, I put the skew on the tool rest in a vertical orientation with the point on the bottom, moved the tool handle to the right so that the bevel rubbed on the blank, and then pulled the handle towards myself until the tool started cutting the wood. I slowly moved this to the left along the blank. The cut that resulted was better than anything I've achieved with a gouge so far, but I've never seen this technique presented in any instructional videos. It caught a couple times when I got lax and let the angle change, but overall it worked very well.


Finally, I found a hazard of turning wood from downed trees out in the country. I chewed up no less than 5 lead shotgun pellets that were embedded in the short chunk of wood! Some were near the middle of the log and others were relatively near the surface. All had wood healed around them, so there's been a heck of a lot of lead flying around out there for a long time. Thought it was a nail at first when I saw the shiny spot and was relieved that the tool wasn't ruined by it, but then dug it out and saw what it was. By the last one, I just kept turning and turned it into shavings along with the rest of the wood.


2010-05-02

Next Few Turnings - May 2010


This is a continuation of some of my past projects.  These were completed in May 2010.


Here's the second turning; I called it a keyring, but is probably better classified as another practice stick.


 I then made a chain pull for a lady at work, but didn't take a picture of it. (It looks just like the semi-teardrop shaped one below.) After that, my mother decided that she wanted chain pulls, but wasn't sure what design she wanted. I made one just like the other one, but the skew caught and split out the main shaft (thin part) just before it was done. I then tried another one and went too thin, blowing through the wall into the center hole.

Being more than a little frustrated, I made a mini baseball bat.


I noticed after I was done that there was a semi-loose knot right at the handle. Not sure why it didn't cause a disaster while it was being turned, but I'm not arguing!


After succeeding at making something other than shavings/junk, I returned to the chain pulls and came up with several different designs. I showed them to her, but she has yet to make up her mind as to which she likes best. (I didn't sand off the tibits on the ends, just because they're more prototype than anything.)


 I really like this apple wood that I've been turning. The pictures don't show too well (probably because there's no finish on them), but the grain pattern is really wild and the color ranges from nearly white to brown to black streaks to solid dark knots.

At the same time, I both wish that it were green instead of dry so it'd turn better and glad it's not; although frustrating at times, I'm forced to use/develop better techniques to avoid problems and will benefit in the long run. I do wish I had some bigger chunks to try bowl turning, but without a chuck, I'd be forced to use my face plate and waste a good chunk of wood for the screws - nothing I have is even close to being big enough.